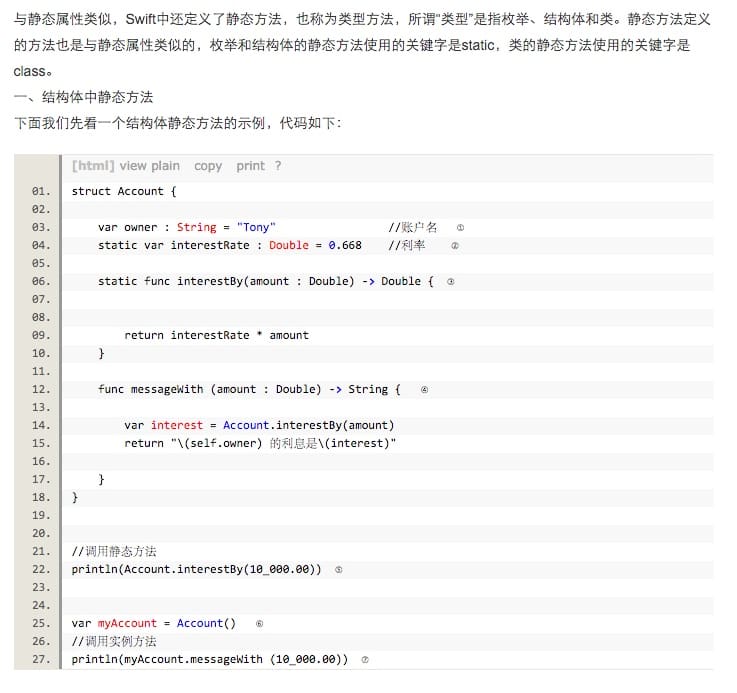
Nextjs做大模型的本地调试,由于Hoppscotch(原来叫:postwoman)一轮请求下来时间要好几秒、又不想到处丢日志信息,所以想着通过断点来调试关键语句…自从Cursor出来之后,就逐渐从VSCode迁移过来了。本质上这俩工具就是一个玩意,只是前者针对 AI 编程全链路进行了深度优化…感兴趣的小伙伴可以看下这篇文章
之前简单写过一篇vscode 中调试 node.ts的文章,有需要可以结合起来看。
问题和排查经过
当我按claude的建议添加了配置后:
{ "version": "0.2.0", "configurations": [ { "type": "node", "request": "launch", "name": "Debug Next.js API", "runtimeExecutable": "pnpm", "runtimeArgs": ["run", "dev"], "env": { "NODE_OPTIONS": "--inspect" }, "console": "integratedTerminal" } ]}我发现控制台启动时有一条显眼的提示:Starting inspector on 127.0.0.1:9229 failed: address already in use
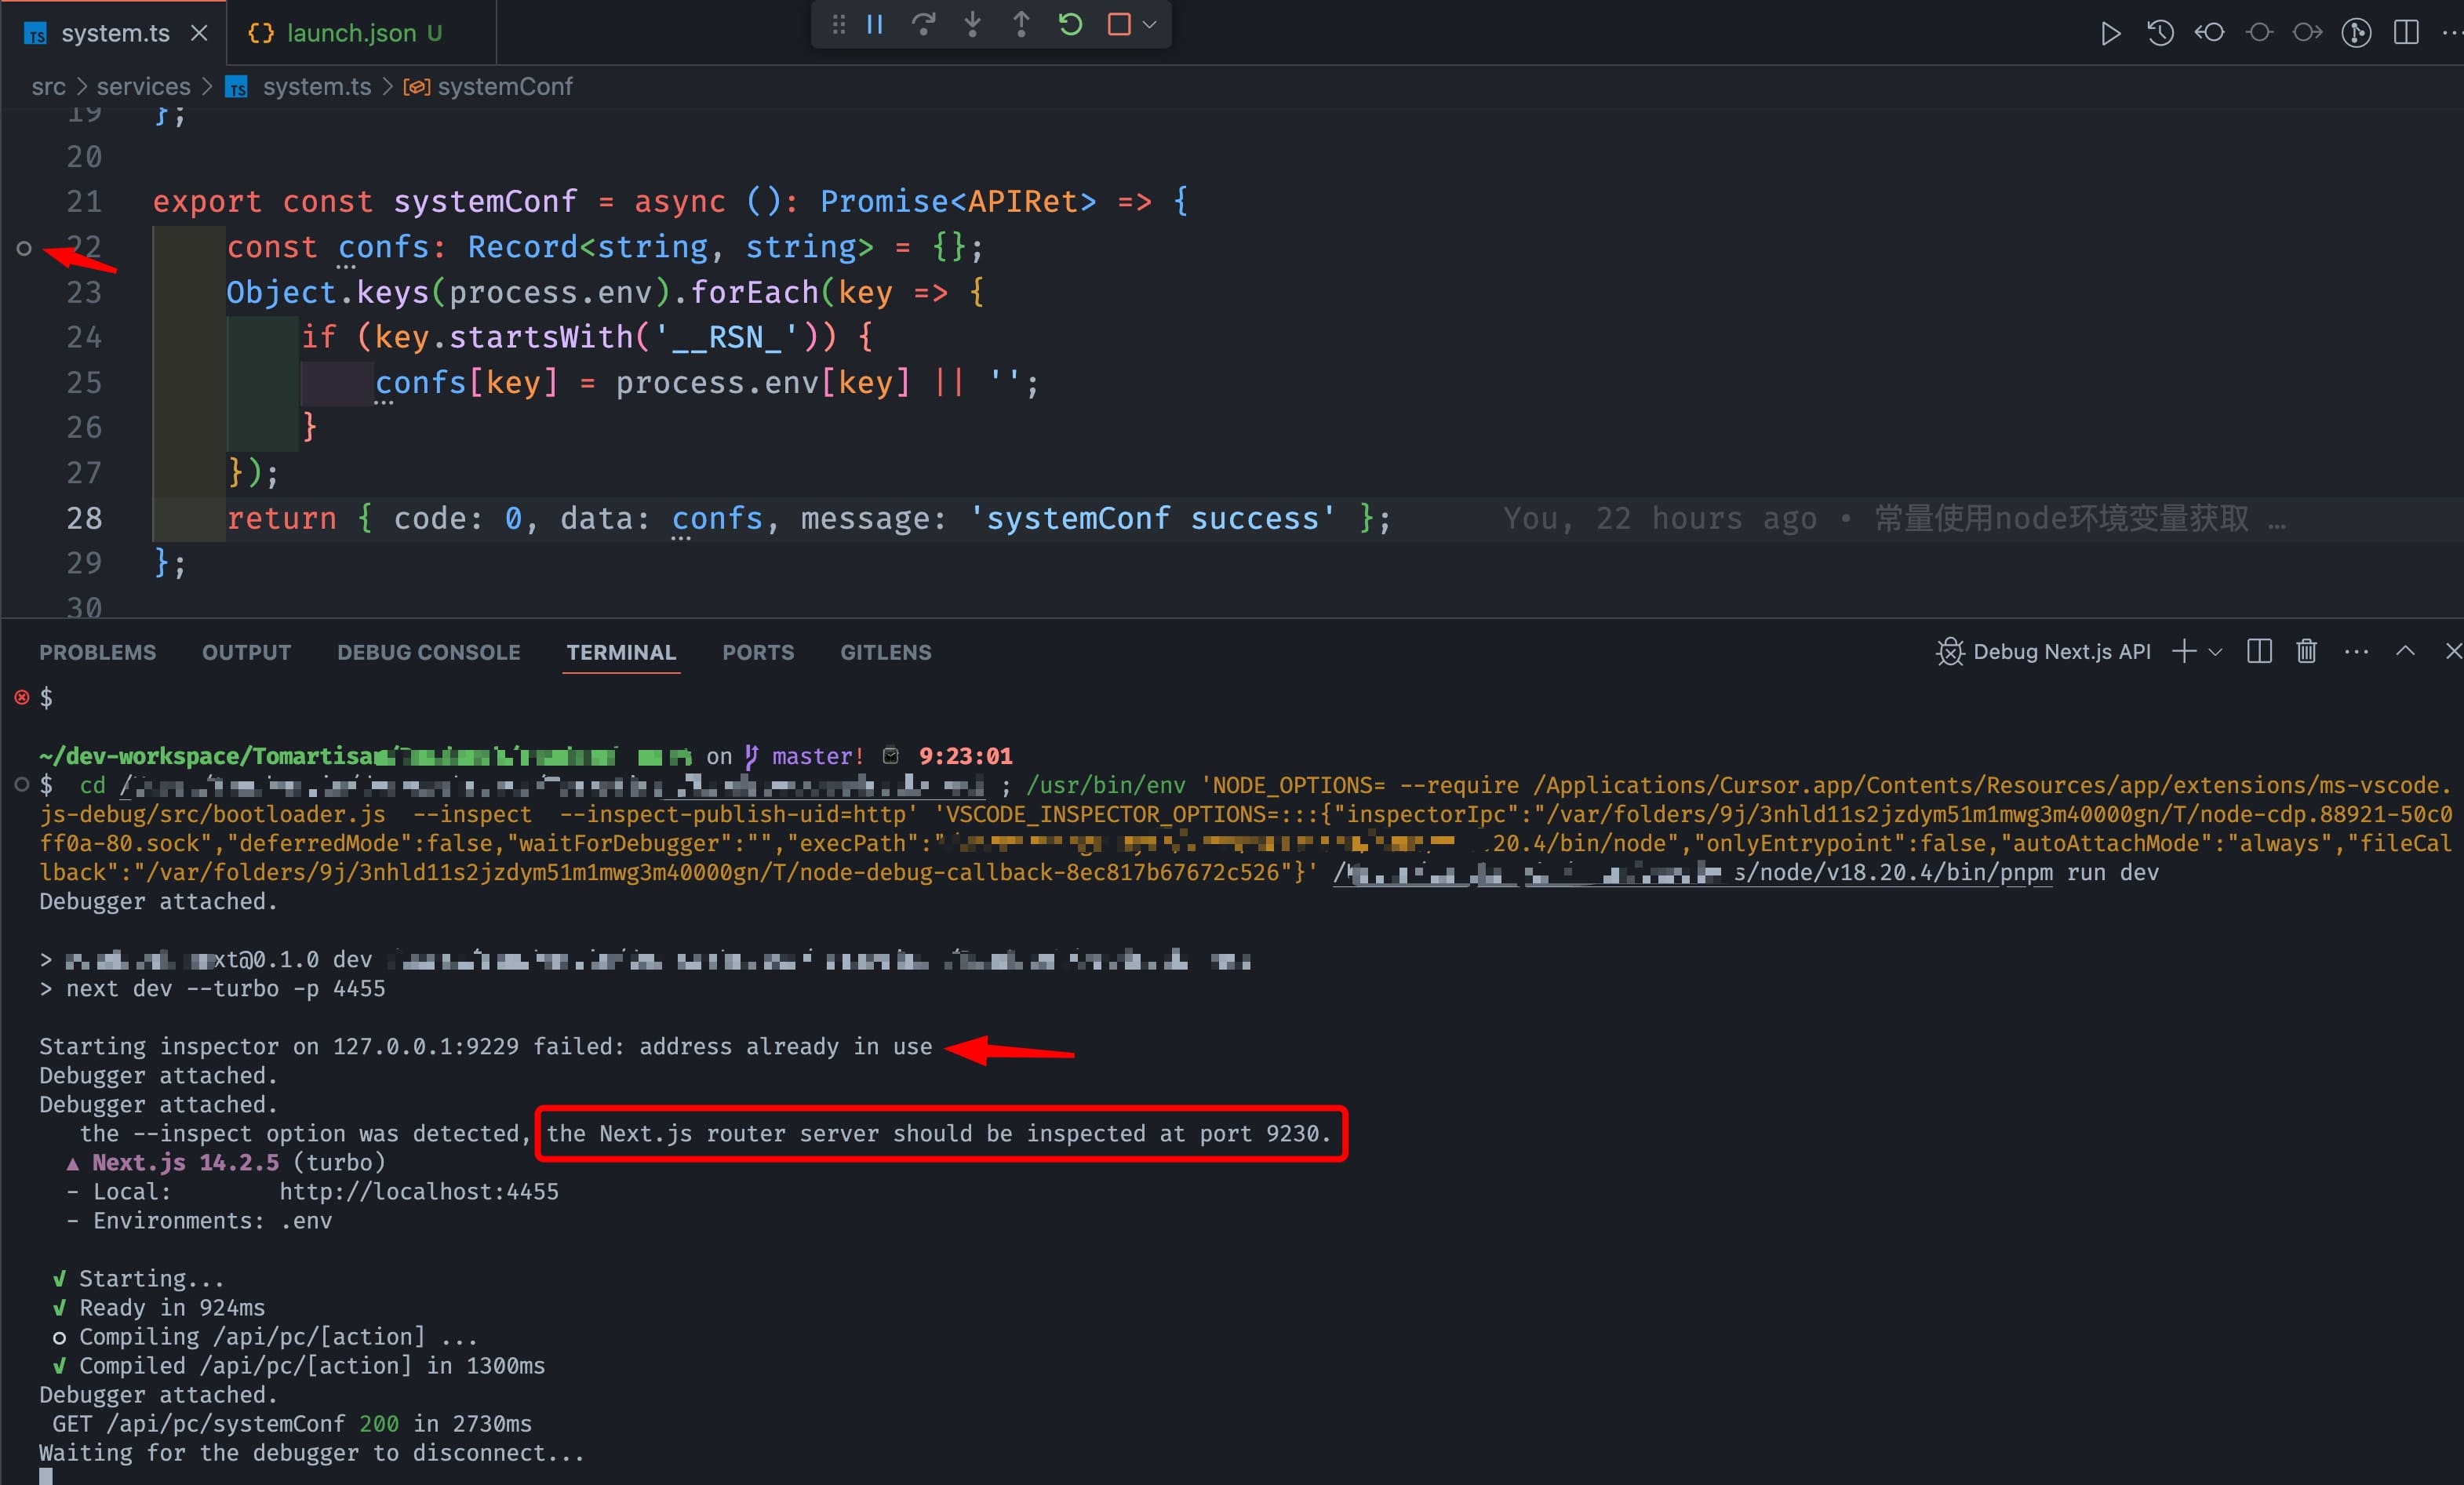
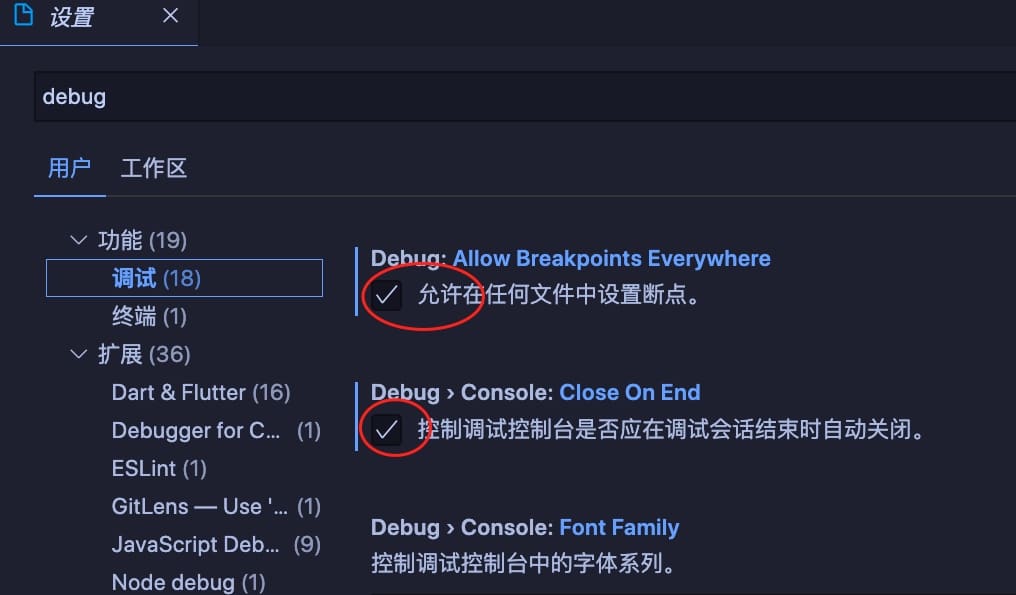
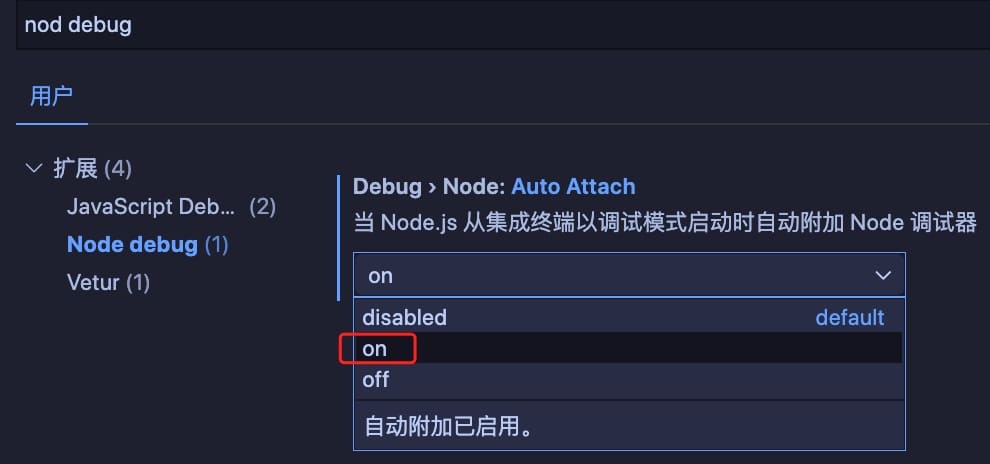
另外,编辑器添加断点的地方还有:Unbound breakpoint:Some of your breakpoints could not be set. If you’re having an issue, you can troubleshoot your launch configuration.

话说claude不是号称现阶段最聪明、最好用的 AI 编程大模型吗,难道连这点小事都搞不定!?于是我又分别问了chatGPT和豆包
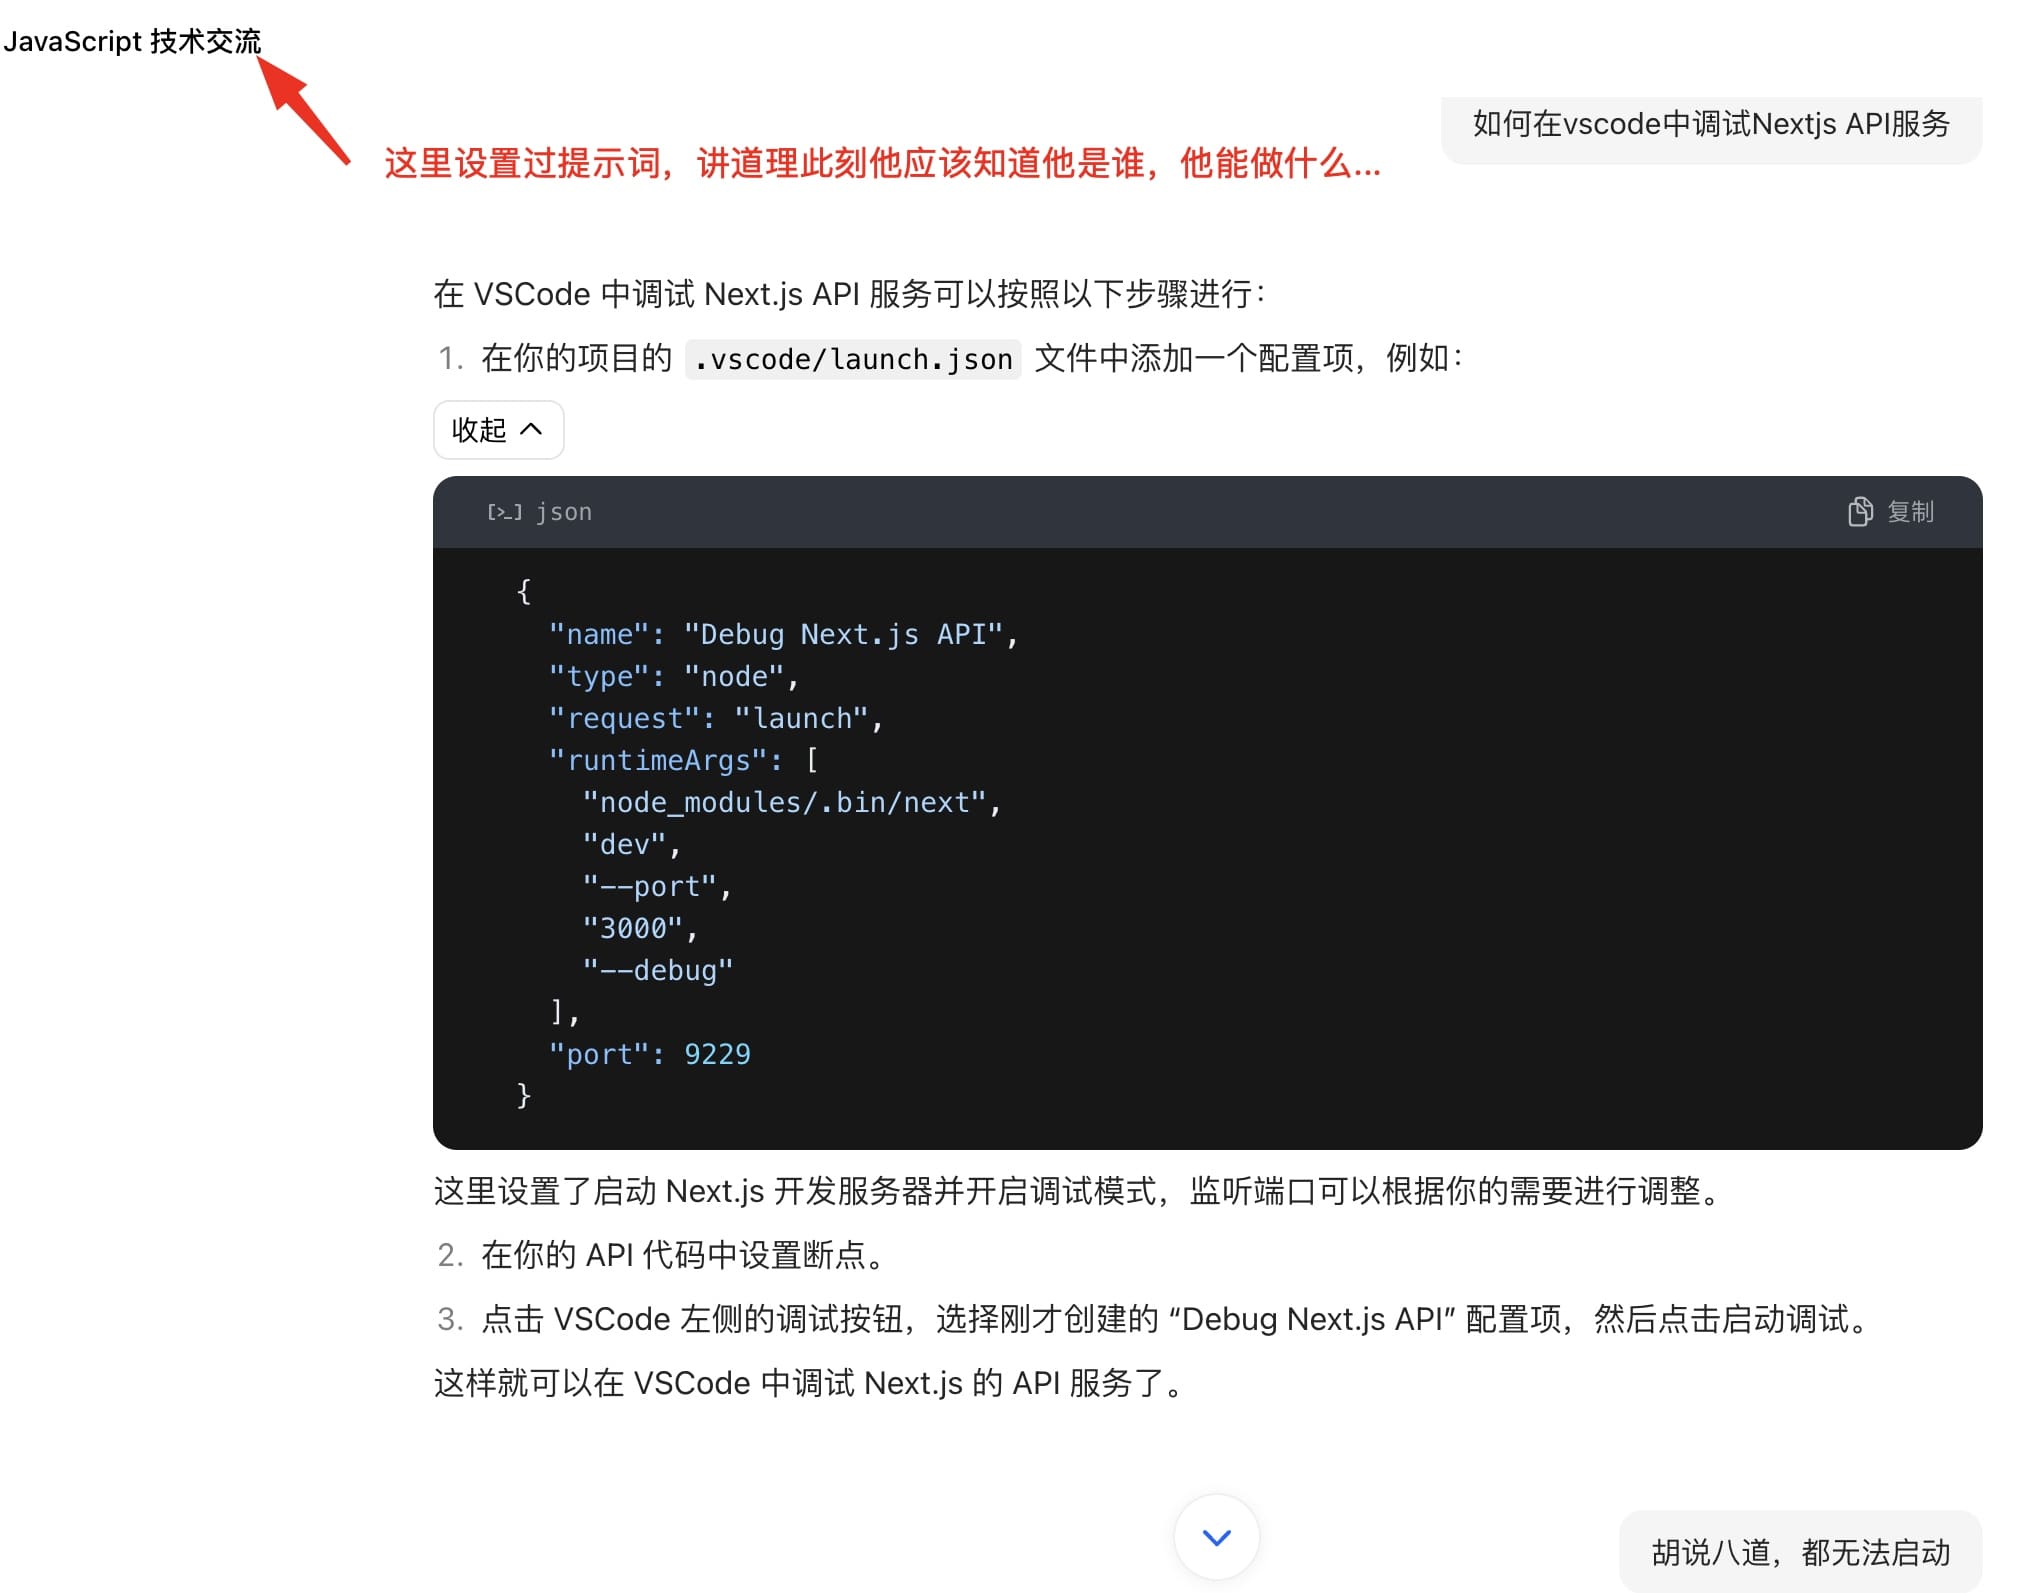
豆包的回答倒是干脆利落,不过结果却是一本正经的胡说八道…
我又多给了它几次机会,也试图把我的问题再描述清楚,直到它开始让我安装npm包去解决,我就不忍再直视了!
然后同样的话又再次问了chatGPT,不过同样没有正确的答案…
我突然意识到,对于大模型第一时间不能给出的正确响应,再继续追问,能问到正确答案的概率也不高(因为往往给出一个不正确的回答之后,再继续问就是针对那个不正确的点,然后各种发散就远离了最初的目的)。特别是越到最后,其幻觉就越明显,就像人一样要承认自己不知道对 AI 来说也挺难呢。
后来,我把同样的关键词组合扔给了谷歌,也确实找到了一些更相关的帖子,特别是在stackoverflow上。我本以为事情就完了,没想到还没这么容易…
一方面不同Nextjs版本可能配置不同,另外提问者起码都是 6 个月之前的情况,看了半天inspector被占用端口的问题算是搞明白了,但是仍然不能 Debug。最终在全球最大的同性交友网站找到了正确姿势:Debugger not binding breakpoints in VSCode
关于 Nextjs Debug 的相关资料
- https://nextjs.org/docs/pages/building-your-application/configuring/debugging#debugging-with-vs-code
- https://stackoverflow.com/questions/69513546/debugging-nextjs-api-endpoints-using-vscode
- https://github.com/vercel/next.js/issues?q=Unbound+breakpoints
- https://code.visualstudio.com/docs/nodejs/nodejs-debugging#_breakpoints
正确有效的配置
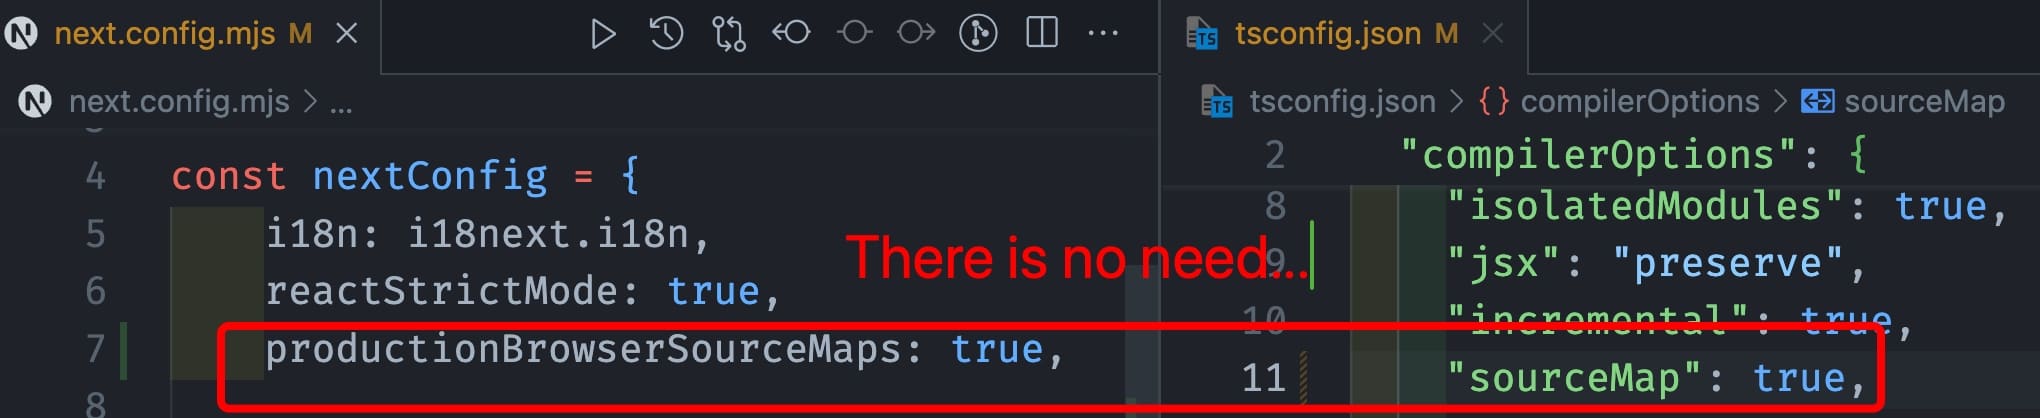
{ "version": "0.2.0", "configurations": [ { "name": "Next.js: debug server-side", "type": "node-terminal", "request": "launch", "command": "npm run dev", "sourceMaps": true, "sourceMapPathOverrides": { "/turbopack/[project]/*": "${webRoot}/*" } }, { "name": "Next.js: debug client-side", "type": "chrome", "request": "launch", "url": "http://localhost:4455", "webRoot": "${workspaceFolder}", "sourceMaps": true, "sourceMapPathOverrides": { "/turbopack/[project]/*": "${webRoot}/*" } } ]}并且,没有折腾 TypeScript 以及 Next Config 的必要。
所有靠玄学可以起作用的,到我这都不好使。最终有效的只有一句:
// 通过 --turbo 启动,精准验证必须加这句"sourceMapPathOverrides": { "/turbopack/[project]/*": "${webRoot}/*"}// 通过 webpack 启动(注意:此处笔者并没有试验其有效性,仅照搬github某comment)"sourceMapPathOverrides": { "webpack://_N_E/*": "${webRoot}/*"}关于如何有效解题
- 用对工具:专业的事情,用专业的工具解决,如果没有那就造一个;
- 用对语言:中文不行,换英文试试。特别是对于编程这个领域,毕竟全球码仔都用这门语言干活,这没啥好说的;
- 经验判断:这个很考验工程师的“道行”,当然也没有特别的捷径。只有多看、多实践、多积累才能形成精准治疗的能力;
- 及时放手:如果花了很多时间仍然没有答案,不妨暂时放手,这能立刻缓解身心健康。然后尝试去专业论坛提问,相信时间的力量;
最后,我想分享一段跟编程强有关的话,来自 AI 大模型爆🔥的这段时间。大意是说未来最好的编程语言,是英语,而不是什么 PHP、Rust 等,与其花时间追风,不如再把英语提升一下。闭上眼镜,用心体会,是不是很有道理呢~
]]>